Summary
The 'Please insert a disk into removable disk' error always occurs on an unreadable, unusable or inaccessible USB drive, pen drive or memory card. If you are troubled by this issue, follow to learn how to remove the error and recovery data from your removable disk with EaseUS Data Recovery Wizard if your disk becomes inaccessible after the fix.
Error Description
A removable disk, such as a USB flash drive, memory card or pen drive sometimes can't work on the Windows OS or Mac OS X, sending error messages that prevent users from utilizing the drive and accessing data. One of the common errors while using USB drive in Windows 10/8/7 is 'Please insert a disk into removable disk G: (or any other drive letter)'.
Tolong dong flashdisk ku 2 gb kingston udah ke detect tapi pas dibuka tulisannya ' Please insert a disk into drive G: ' gimana dong??? Trus aku pake soft mmcmedic mau kuformat tapi cuma sampai 1 gb dan tulisannya corrupt. In order to fix the problem “please insert a disk into removable disk” in Windows 10/8/7, you can firstly try to re-insert the removable disk or run a reliable anti-virus software. Sometimes that can fix the problem.
What Will Happen When 'Please insert a disk into removable disk' Error Occurs
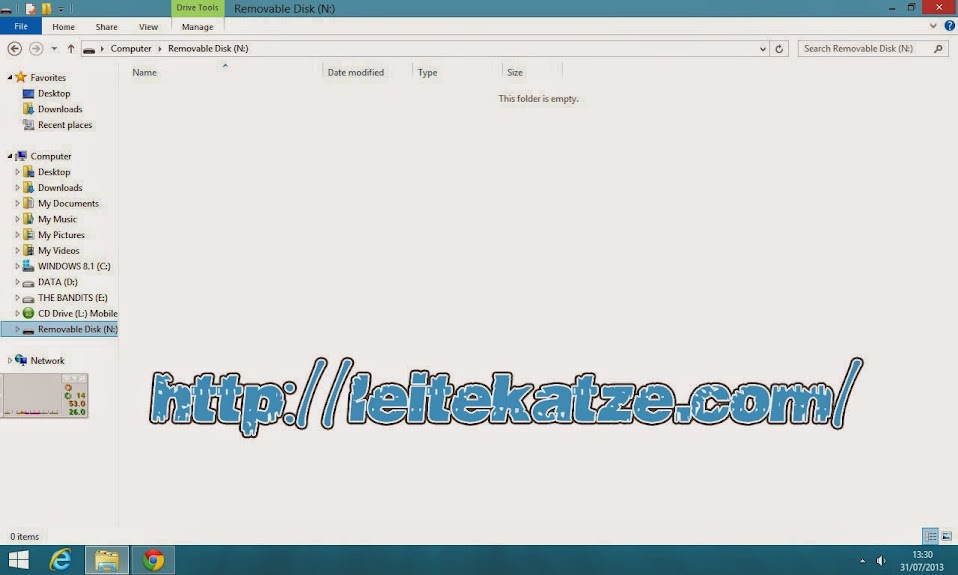
- Double-click on the USB drive letter and trying to open it, Windows prompts error 'please insert a disk into removable disk'.
- The USB drive shows 0 bytes used and 0 bytes available when checking its properties.
- The USB drive state is 'No Media' in Disk Management.
- Can't format the USB drive as 'Windows was unable to complete the format'.
Causes
When you receive the notification 'Please insert a disk into removable disk (drive letter)' while trying to open the device, it's probably because:
- Your removable device is not well connected
- Your USB drive is not recognized by the computer
- Your device is inaccessible
These cases may result from hardware issues or physical damage on the USB drive. If you are not sure about the specific cause of the error, we recommend you follow the solutions we provided below to have a try.
| Workable Solutions | Step-by-step Troubleshooting |
|---|---|
| Fix 1. Change a USB port | Connect your USB drive to your computer via the rear USB ports and..Full steps |
| Fix 2. Assign a New Drive Letter | Log in as Administrator account in your system or any other account with administrative privileges..Full steps |
| Fix 3. Scan Hardware Changes | Go to 'This PC' > 'Manage' > 'Device Manager'. Find and right-click your USB drive..Full steps |
| Fix 4. Update Driver | Go to 'This PC' > 'Manage' > 'Device Manager'. Find and right-click your USB drive..Full steps |
| Fix 5. Format the Drive | Right-click This PC/My Computer > Manage > Disk Management..Full steps |
| Fix 6. Repair USB Drive | If there is such a repair tool available for your USB drive, you can download and run..Full steps |
How to Fix 'Please insert a disk into removable disk'
In most of the cases, if you get the prompt 'Please insert a disk into removable disk', you will see the USB drive shown as 'no media' in Disk Management. That indicates physical errors of your device. To help you make your USB drive usable again, we detail all the possible ways to fix the issue 'Please insert a disk into removable disk'.
Method 1. Change the Connection of the USB Drive
Generally, you connect a USB to your computer via one of the front USB ports. Technically, there is no difference between the front and rear USB ports. However, since the front USB ports are connected to the motherboard via a cable while the rear USB ports are soldered to the motherboard directly, the rear USB ports are more stable compared to the front ones. Thus, connect your USB drive to your computer via the rear USB ports and check whether the problem still exists.
In addition to excluding the connection issue, you can also change the USB cable to have a check.
Method 2. Assign a New Drive Letter to the USB Drive
If the drive letter of your USB drive is conflicted with the drive letter of one of the partitions on your computer, you may receive the error prompt saying 'Please insert a disk into a removable disk.' If you are sure there is such a conflict, follow the steps below to manually assign a new drive letter to your USB drive.
Step 1. Log in as Administrator account in your system or any other account with administrative privileges.
Step 2. Press 'Windows + X' and click 'Disk Management'.
Step 3. Right-click on your removable drive partition and select 'Change Drive Letter and Paths' under Disk Management.
Step 4. Change the drive letter to any drive letter which has not been assigned to in windows.
Method 3. Scan for Hardware Changes
The feature 'Scan for hardware changes' is used to examine and the load the changes you made to your hardware. Execute this operation is also helpful to remove the error 'Please insert a disk into removable disk (your USB drive)' in some cases.
Step 1. Go to 'This PC' > 'Manage' > 'Device Manager'.
Step 2. Find and right-click your USB drive, then choose 'Scan for hardware changes'.
Step 3. Check whether your disk works properly again.
Method 4. Update Driver
If you've got a problem with a device, you should consider upgrading the driver. Drivers are what make the interaction between your computer and a hardware device happen. To update drivers:
Step 1. Go to 'This PC' > 'Manage' > 'Device Manager'.
Step 2. Find and right-click your USB drive, then choose 'Update'.
Step 3. Check whether your disk works properly again.
Method 5. Repair the Drive by Formatting
Note: Formatting will erase all the files on your storage device. Be careful to perform the operation if you have important files on the USB drive.
You can also follow the steps below to format the hard drive and repair 'please insert a disk into removable disk' error in Windows 10/8/7 PC to have a try. Depending on the situation you are in, the effectiveness of this tip varies.
- Right-click This PC/My Computer > Manage > Disk Management;
- Right-click on the hard drive, USB/SD card etc > Format Volume > Reset File System (NTFS/FAT32 etc.) and rename the device;
- Click Finish to complete repairing devices with 'please insert a disk into removable disk' error;
Method 6. Repair your USB Drive
Some manufacturers of USB drives provide exclusive repair tool for the device they produce. If there is such a repair tool available for your USB drive, you can download and run the utilities to check and repair the errors on your device. Some of the repair tools fix the errors by restoring your USB drive to factory settings, which means the data on your device will be erased. Thus, if there are important files on the problematic removable device, you are not recommended to try this method. Or you can try to recover data from the inaccessible hard drive and then repair it.
After applying the solutions above, you will probably encounter three kinds of situations:
- Your USB drive is shown properly in Disk Management and you can use it as usual.
- Your USB drive is not shown as 'No Media' in Disk Management anymore. Instead, the USB drive is shown as 'RAW' or the device can be recognized by Disk Management but is still inaccessible.
- Your USB drive state is 'No Media' still.
If you are in the first situation, you can eliminate your worries now since you have solved the problem 'Please insert a disk into removable disk' successfully. If you are in the second situation, you should feel relieved since your data can be rescued with third-party software, which is presented below. However, if you are in the third one, it's highly likely that your removable device has suffered from some physical damage. In that case, we heartily recommend you send your USB drive for manual repair.
How to Recover Data from Inaccessible USB Drive
It's possible that after you try the fixes for error 'Please insert a disk into removable disk', you bring your disk 'half' back to life. That means you haven't fixed it fully but it is far better than its original 'No Media' state. If you check the USB drive in Disk Management and see the disk shown as RAW or something else that indicates your USB drive can be recognized, you can recover files from your inaccessible USB drive.
To recover data from USB drive that is RAW or inaccessible, you can use the advanced hard drive recovery software - EaseUS Data Recovery Wizard. It can:
- Recover deleted/formatted/lost data
- Recover files from RAW, inaccessible or virus-infected devices, including local/external hard drive, USB, memory card, digital camera..
- Recover almost all file types
Besides, it's 100% secure, virus-free, and plugin free. To recover data from your inaccessible USB drive:
Step 1. Choose the flash drive to scan.
Launch EaseUS Data Recovery Wizard and choose your flash drive where you lost important files. Click 'Scan' to start.
Step 2. Check and preview found flash drive data.
After a quick and advance scan, you can quickly locate a specific type of file by using the Filter feature as well as the Search.
- Filter: A quick way to your wanted files.
- Search: e.g. File name/file extension.
Step 3. Restore flash drive data.
After checking and finding lost flash drive files, select them and click Recover to restore. You shall save the found files to a safe location on your PC rather than to your flash drive.
After the data recovery, you can now switch to a new USB drive to send the device for manual service.
The Bottom Line
Honestly speaking, if one of the first three methods fails to fix 'please insert a disk into USB drive', it's highly likely there are hardware damages on your USB drive, which cannot be fixed using any of the methods provided here. In such a case, you should send your device for manual repair.
Summary :
Cannot open hard drive? Cannot access drive because of the “The Device Is Not Ready” error message? You can use the best file recovery software - MiniTool Power Data Recovery to recover lost data from inaccessible hard drive without damaging the original data. And, this post lists 5 solutions for this error as well as 7 solutions to 'This device cannot start (Code 10)' issue.
Quick Navigation :
Error Message - The Device Is Not Ready
Have you ever encountered the 'The device is not ready' error message?
Let's have a look at a real case of the issue from Microsoft Community.
Windows 10 'the device is not ready'
I have connected numerous 2.5' and 3' external drives to my PC via USB, and for every drive I receive the 'the device is not ready' error message.
I have looked at every post I can find relating to this problem and have tried all the recommended tips/answers - all to no avail.
Has anyone found a definitive answer for this problem?Microsoft Community
Now, I guess you might be wondering:
Download Karuvinil Enai Song With Lyrics Kgf Chapter 1 Tamil Movie Yash Srinidhi Shetty Song Mp3. When there is a damaged backlink we're not in control of it. Download mp3 Karuvinil Enai Song With Lyrics Kgf Chapter 1 Tamil Movie Yash Srinidhi Shetty free! We don't upload Karuvinil Enai Song With Lyrics Kgf Chapter 1 Tamil Movie Yash Srinidhi Shetty, We just retail information from other sources & hyperlink to them. Sathirapathi song mass thamiln. Each of the rights over the tunes would be the property of their respective owners.
'What could be the cause of this error? Is it possible to recover data from inaccessible drive? How to fix the device is not ready in Windows 10?'
Top recommendation: You can read our previous post 7 Situations Where There Is the 'Location Is Not Available' Error to know more information about inaccessible hard drive.
Why Do You Get The Device Is Not Ready Error Message on USB/HHD?
- This error message often pops out due to many reasons, including:
- The storage device is not well connected.
- The storage device is damaged.
- The storage device is incompatible with your computer.
- ..
After knowing the reasons, I am going to show you how to recover data from inaccessible hard drive as well as how to fix the device is not ready internal HDD/external HDD.
CHAPTER 1. Recover Data from Drive with 'The Device Is Not Ready' Error
If you cannot access your hard drive, external hard drive, USB drive, and other drives because of the device is not ready error, you are recommended to restore lost data from this drive before dealing with this error because any mistake during the repair could lead to data loss permanently.
However, how to recover lost data? Is it possible to effectively recover lost data without affecting the original data? MiniTool Power Data Recovery, a piece of professional, read-only and easy-to-use file recovery software developed by MiniTool Solution Ltd., is recommended here.
This professional data recovery software can help you effectively recover lost data without bringing any damage to the original data. Besides, this professional data recovery software is compatible with different operating systems including Windows 10, Windows 8, Windows 7 and more.
Now, let's see the detailed steps to recover lost data from drive which prompts the device is not ready.
Step 1. Select the target volume.
Launch MiniTool Power Data Recovery to enter its main interface as follows, and then select a suitable data recovery module to recover lost data.
In the main interface of this professional data recovery software, you can see 4 different data recovery modules, and each of them focuses on different data loss scenarios.
- This PC recovers data from formatted, damaged and RAW partition without damaging the original data. Generally speaking, as long as the partition exists, you can recover lost data by using this data recovery module. And, this recovery module is selected by default.
- Hard Disk Drive can recover data after partition loss or deletion with ease.
- Removable Disk Drive is designed to recover lost photos, mp3/mp4 files, and videos from flash drives and memory sticks in the event of any problems occurring.
- CD/DVD Drive recovers data from CD & DVD discs.
Here, you can keep This PC, and then select the target volume you want to recover its data.

Step 2. Scan the target volume.
Press Scan button at the lower right corner to begin full scanning on the device. Note: While scanning, you can preview and save needed files. However, it is recommended to wait until the full scan finishes to get the best recovery result.
Step 3. Select all needed files, and save them on a safe place.
After full scan, all found files would be displayed in a neat tree view as shown below. Now, select all needed files, and click Save button to store them on another drive.
To save all found files, you had better choose its advanced edition. Personal Deluxe, for example, is a good choice. It not only can recover unlimited data but also can help to recover data when PC won't boot because of its Snap-in WinPE Bootable Builder feature. More importantly, it offers free lifetime upgrade service.
See! Within only 3 steps, you can easily and quickly recover lost data from inaccessible drive. Now, let’s see how to fix the device is not ready external hard drive.
CHAPTER 2. 5 Solutions - The Device Is Not Ready in Windows 7/8/10
Solution 1. Check the drive connection
In order to verify whether the error is caused by loose connections or damaged computer USB ports, you can do the following steps.
Step 1. Disconnect the storage device and insert it into your PC through the same USB ports to check if the device was loosely connected. If the error disappears, you can make sure that neither of your inserted device and the related USB port is damaged. But, if the error still exists, you can go on trying next step.
Step 2: Disconnect the device and plug it into your PC by using a different USB port. If this device can be accessed well, it is absolutely the damaged USB port that causes the problem. If this method doesn't work, you'd better go to next step.
Step 3: Connect your hard drive to another computer that reads USB drives properly to check whether the problem is caused by the computer or operating system.
If this solution cannot solve the device is not ready external hard drive issue, try solution 2.
Solution 2. Uninstall and reinstall the USB controller driver
Some users reported that they successfully solved the device is not ready in Windows 10 issue by following the below steps.
Step 1. Right-click This PC, click on Manage, and then choose Device Manager.
Step 2. Expand and navigate devices on the right pane to find out the device that is not ready.
Step 3. Right-click on the name of your device, and choose Uninstall. Or, double-click the target device and then choose Uninstall.
Step 4. Unplug the drive.
Step 5. Restart PC, and then reconnect your drive to check whether the device is not ready external hard drive error has been solved.
If you still receive the error after trying the above 2 solutions, you can open Disk Management interface and see how it is displayed there.
Solution 3. Check how this device shows in Disk Management
Case 1. Drive shows not initialized
If your drive has not been initialized, the drive is not recognized and you will receive the following error message:
Virtual Disk Manager 'The Device is not ready'.
Now, you can try the following steps to solve this issue.
a) Press Win+R (Windows logo key and R key) at the same time.
b) Type diskmgmt.msc in the run box and then press Enter key.
c) Right-click on the name portion of the disk entry, where it says Disk [#].
d) Select Initialise Disk from the right-click context menu.
e) After that, you will be given detailed operating prompts. Just do as told.
Case 2. Drive shows unallocated
Sometimes, users who encounter the device is not ready in Windows 10, Windows 8 or Windows 7 will find their drive shows unallocated space in Disk Management. Now, they can try the following 2 simple ways to solve this issue.
① Create new partition on the unallocated space
Right-click the unallocated space, choose New Simple Volume, and then follow the wizards to complete this task.
② Recover lost partitions as well as data from the unallocated space
If your drive contains massive important data and becomes unallocated space, you can try using a partition recovery tool to deal with the device is not ready error message on internal HDD/external hard drive/USB.
VIDEO TUTORIAL
I effectively recovered unallocated space with data on it.
Case 3. Drive shows RAW
Sometimes, users who encounter the “the drive is not ready” error message will find their drive shows as RAW file system. Now, to successfully solve the device is not ready internal HDD issue, you can format your RAW drive to NTFS/FAT32.
Useful Article: How to Convert RAW to NTFS in Windows 7/8/10 on External Hard Drive is recommended here.
Solution 4. Check your disk for errors
As we know, the 'The device is not ready' error is very likely resulted from file system errors or bad sectors on the drive. Therefore, you can run CHKDSK utility to check your disk for errors.
The steps are:
1) Go to the start menu, type in 'cmd' in a search bar and press OK button to continue.
2) Right-click Command Prompt and choose Run as administrator, and click Yes button in the pop-up window.
3) Type this command 'chkdsk X: /f' and press Enter button. Replace X with the letter of your hard drive partition.
4) Type exit and press Enter.
Solution 5. Replace your drive
If none of the solutions above works on your device, your drive is probably damaged seriously. Now, you had better replace the old drive with a new one and try your best to recover lost data from the old drive.
CHAPTER 3. Bonus Tip – This Device Cannot Start. (Code 10)
Last but not least, we will show another issue - This device cannot start. (Code 10)
What Does This Device Cannot Start Code 10 Mean?
As one of several Device Manager error codes, the Code 10 error is generated when Device Manager can't start the hardware device, a situation usually caused by outdated or corrupted drivers. Besides, if the driver generates an error that Device Manager doesn't understand, this device may also receive a Code 10 error.
This device cannot start. Try upgrading the device drivers for this device. (Code 10)
How to Fix Error: This Device Cannot Start (Code 10)
There are several methods to help you fix a code 10 error.
Fix 1. Restart computer.
Oftentimes, a temporary problem in Device Manager or with the hardware may cause the error Code 10. Therefore, try restarting your PC to fix the device Cannot start code 10.
Fix 2. Delete the UpperFilters and LowerFilters values.
Both UpperFilters and LowerFilters values in the Windows Registry could be corrupted, causing the Code 10 error. Delete them in the registry.
Fix 3. Update the drivers.
An outdated driver may cause device Cannot start code 10. Try updating drivers to correct the Code 10 error.
Fix 4. Uninstall the driver.
If the updating driver cannot solve the Code 10 error, you can try uninstalling and reinstalling it.
- Go to Device Manager.
- Right-click the device that is causing the code 10 error, and select Uninstall on the context menu.
- Select Delete the driver software for this device and click the OK button.
- Restart computer and reinstall the device to see if the device Cannot start code 10 is solved.
Fix 5. Install the latest Windows service pack.
It uses higher initial values and security key values which makes this system secure as compared to its counterpart. WPA Weaknesses.  It was developed to outperform the weaknesses of the WEP network.
Microsoft often releases service packs and other patches for Windows, and one of which might contain a fix for the Code 10 error. It is recommended to install the latest Windows service pack.
Fix 6. Replace the hardware.
Sometimes, a Code 10 error may be caused by a problem with the hardware device. And, if the device is not compatible with your version of Windows, you also encounter the code. It is recommended to replace the hardware to fix this issue.
Fix 7. Reinstall Windows.
If the problem still persists, you can try reinstalling Windows.
Related article: Detailed Steps and Instructions to Reinstall Windows 10.
Bottom Line
Are you still worrying about the device is not ready error? Now, you can try the above solutions to deal with the device is not ready in Windows 10/8/7 issue.
If you have any other good solutions about this error, please share them with us by writing them on the following comment zone.
If you have any questions about recovering lost data from inaccessible hard drive by using MiniTool Power Data Recovery, you can directly send us emails via [email protected]. We will solve it as soon as possible.